
Getting Started
Getting Started Guide
- Add links for all of your review site listings
- Choose a layout for your review funnel landing page
- Send customers to your landing page
Welcome aboard! This guide will help you quickly set up your landing page so you can start getting more and better reviews for your business. Now that you have an account, make sure you’re logged in.
Creating your first landing page
First, click the large Add a Business button if you see it. It will look like this:

From here, we’ll start in the Dashboard, your account’s default homepage. From now on, this is the page you’ll land on whenever you login.
![]()
Now that you’re here, let’s link up your review site listings. Don’t know them? Don’t worry. You can add your listings on major sites (Yelp, Google, Facebook, and more) automatically by clicking Connect a Location and following the on-screen instructions.
And you can add specific review site listings by clicking the Add a Link button. Click here for details on how to automatically and manually add your links.
You can also collect reviews directly from customers on your landing page without going through a third-party site. Quickly access this feature by clicking the Add a Link button and choosing the Review Now button at the bottom of the list that appears.

Your dashboard and landing page should now look a little more like this:
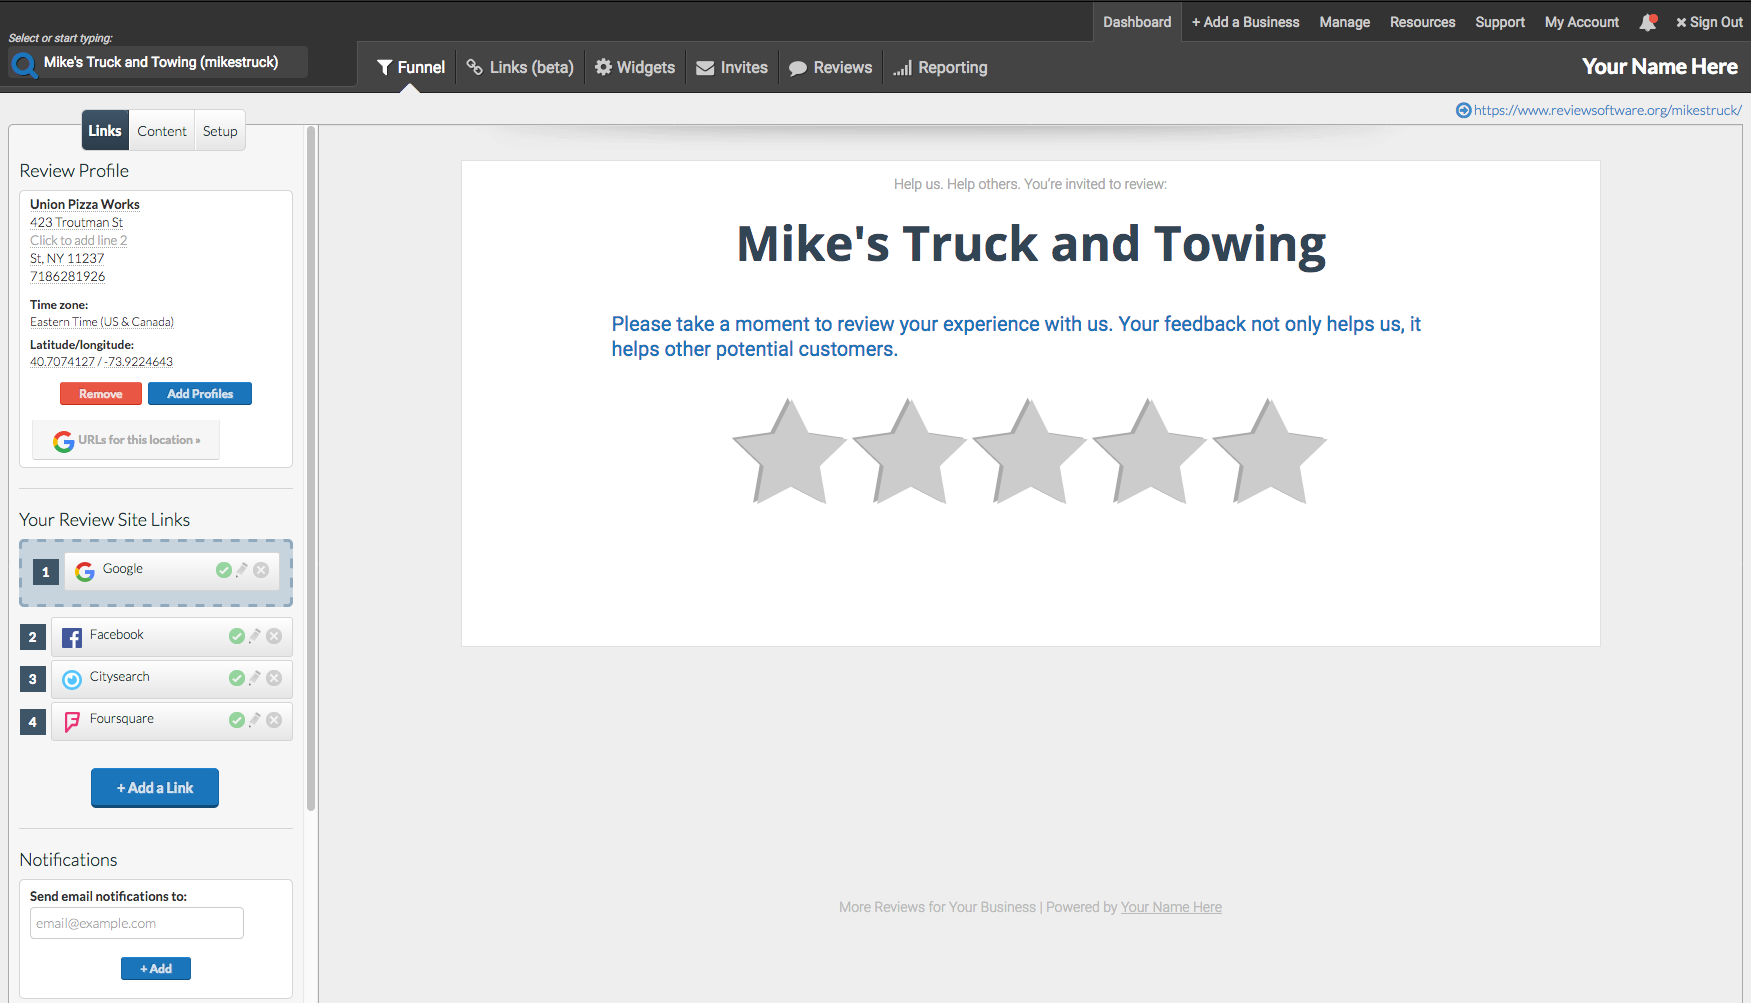
Next, let’s choose a layout. Read about all of the different layouts here and choose the one that’s best for your goals.
Segmenting layouts allow you to catch unhappy customers before they leave a negative review on a third-party site and give them a direct line of communication with your business. By default, your landing page will start with the Stars segmenting layout active.
If you’d like to choose a different layout, navigate to Dashboard > Funnel > Setup > Branding and Design. Below the image of your active layout, click the Change button. Select a new layout from the pop-up that will appear.
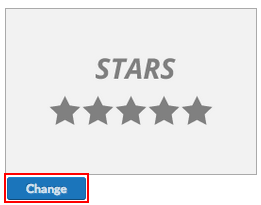
Click here for more details about changing your layout.
Engaging Your Customers
Now that you have the fundamentals of your landing page set up, it’s time to get your customers to the landing page to leave feedback and reviews.
Navigate to Dashboard > Invites > Email to add recipients to your email list and begin sending them our automated email sequence.
Click here to learn how to get started with an email drip campaign
You can also enable text message campaigns

If you’d like to engage your customers via other methods, click here for an introduction to all of the different tools we provide to get people visiting, clicking, and reviewing.
Next Steps
- Want to setup your first automated email drip campaign? Click here to get started with email drip campaigns.
- Want to add review monitoring to your page? Click here to get started with Review Monitoring.
Note: In edge cases where a user has multiple Google accounts connected and is not logged in, the Google link will not function as intended.
Getting Started with Review Monitoring
Getting started with email drip campaigns
Our automated email campaigns allow you to reach out to your recent customers over time to facilitate a steady stream of reviews. Follow the steps below to get the most out of your campaign.
1) Customize/set up your campaign
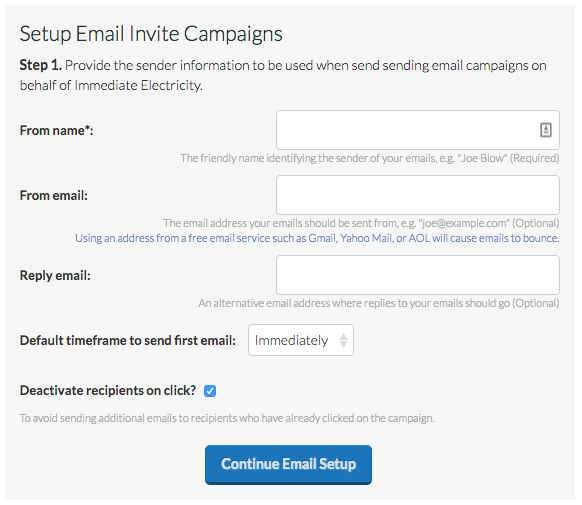
Before accessing any campaign features, you must first complete the initial campaign setup by filling out the fields in the Setup Email Invite Campaigns window. Once you have completed this setup, you’ll have access to all campaign features.
By default, the first email to a recipient will be sent out Immediately after a recipient becomes Active (more on this below). Deactivate recipients on Click will also be turned on. You can adjust both of these settings in the setup window.
Please note: using a free email address – e.g. Gmail, Yahoo, Aol – in the From email field can cause your campaign emails to bounce.
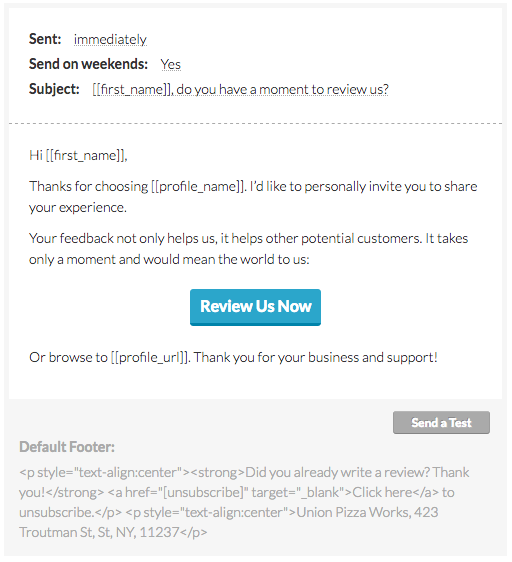
Before sending out any emails, take some time to customize your email campaign. This will help convert more customers into reviewers. Consider personalizing or intensifying the wording of the emails. The default language is serviceable for a wide range of businesses, but the more directly you can speak to your customers, the more you stoke the sense of reciprocity that motivates them to complete a review for you.
If you need some ideas, consider mining your existing reviews for other motivators to touch on in your email messaging. For example, highlighting yours as a local business that needs your customers’ support to compete with the Big Guys – people love to be needed and many want to support your business.
To get started, go to Dashboard > Invites > Email. Click here to learn how to customize your emails.
2) Create a spreadsheet and upload your recipients
While you can upload recipients one-by-one (click the Add a Recipient button), you can upload a high volume of recipients at once by creating a CSV or XLSX file according to the instructions here.
Upload your file by going to Dashboard > Invites > Recipients and clicking the Upload CSV/XLSX button.


3) Activate your recipients
When setting up an automated email drip campaign, contacts you upload (via CSV/XLSX or one-by-one) will automatically be added to the ‘Pending Recipients’ list, where they will stay until one of the following happens:
- They’re automatically moved to the Active Recipients list (you must toggle on Auto-activate pending recipients daily?)
- They’re manually moved to the Active Recipients list (after clicking Activate all Pending Recipients or toggling the ‘check mark’ in their entry on/green).
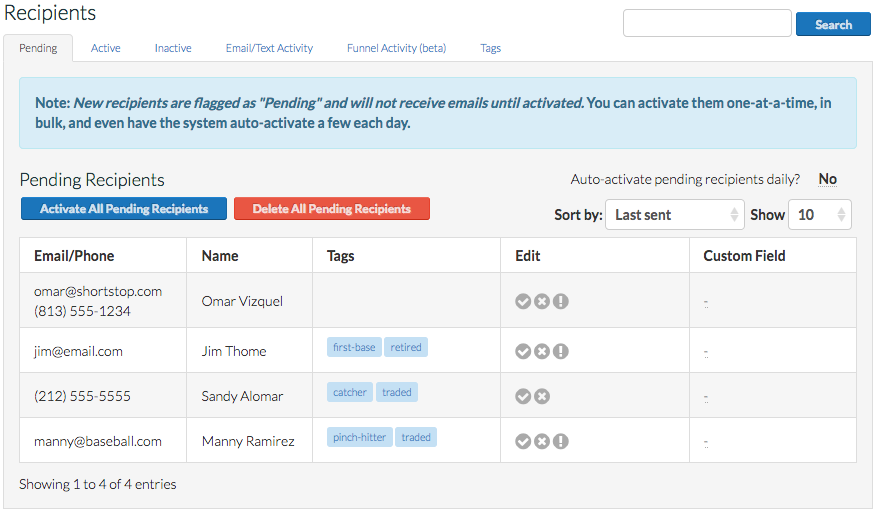
Auto-activating recipients
This feature will automatically move a set number of recipients to your Active Recipients list every day (provided that there is enough room on the Active recipients list – you are limited to 100 active recipients by default).
To turn on this feature, set Auto-activate pending recipients daily? to Yes. You can then set how many recipients per day you’d like to activate (the default is 10).

Once a recipient is active, they will begin receiving your email drip campaign. Active recipients eventually become Inactive recipients. Inactive recipients have either:
- Received all emails
- Unsubscribed
- Submitted a review directly to your landing page (i.e. not to any third-party site)
- Submitted feedback via the contact form
- Opened or clicked through a campaign email (only if you’ve turned on either of these settings in Dashboard > Invites > Recipients > Activity)
Inactive recipients stay on the list for 180 days (unless you manually delete them or change the expiration date), after which they can be re-added as active recipients. The system will prevent you from re-uploading recipients on the ‘inactive’ list, thus preventing you from sending your campaign to the same customer twice. Please click here for more information on pending, active, and inactive recipients
Tools for staff and clients
You can use our shared invite and opt-in forms to engage staff, clients, and end customers in the recipient adding process. Access these forms at Dashboard > Invites > Invite & Opt-in Forms.
The shared invite form is a password-protected web portal that you can give to staff or clients to let them add recipients one-by-one or via bulk upload.
The opt-in form can be presented to the business’ customers to have them opt-in on-site and move directly to the Active Recipients list (if the list is full, the recipients will instead go to Pending).

Spam
Please note that while our system benefits from high deliverability, a certain percentage of emails (around 15 percent of all opt-in marketing emails) will inevitably end up in spam filters – even if you’ve done everything “by the book”. Please click here for detailed information about email drip campaigns and spam filtering.
If you’re continually experiencing issues with spam filtering, get in touch.
Getting started with a multi-location business
- Set up a profile for a business with more than one location, branch, or professional.
1) Convert your profile
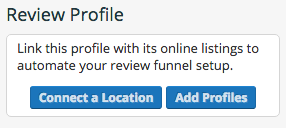
First, create a new profile for one location of your business as you would any other. You can add in details now or later. To begin setting up a multi-location review funnel, navigate to Dashboard > Funnel > Links > Review Profile. To convert to a multi-location landing page, click the Add Profiles button.
Confirm your choice and the page will convert into a multi-location profile. The preview window will now show your top-level (parent) landing page, where customers can choose the location they visited. Your original profile will be automatically converted to [Business name]: Profile 1. You can edit this at any time.
Each link button on the new top-level landing page now represents an individual business location. When clicked, the button will take the customer to that location’s landing page.

A multi-location parent profile immediately after converting
2) Add more locations
There are two ways to add locations. If you’re dealing with only a handful of locations, we recommend adding them individually. If you’re dealing with a large number of locations, we recommend you add them in bulk.
Adding locations individually
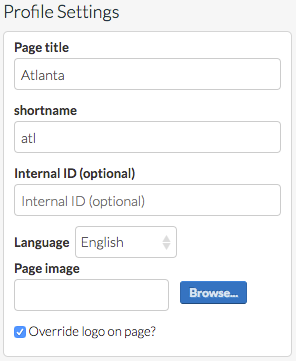
Add a single new location/landing page by clicking the Add a Profile button.
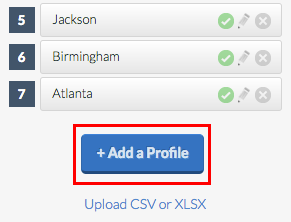
Give your new profile a Page title, a unique shortname, and an optional Internal ID. You can copy customized text content, email text campaign, and/or CSS styling from another location by selecting it from the list that appears under Copy content from another page. Press Submit to finish.

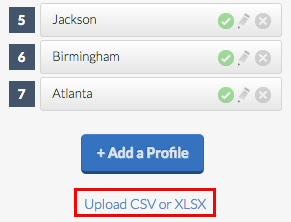
Adding locations in bulk
If you’re working with a large number of locations, we recommend using the bulk upload method described here.
3) Edit your profiles
Editing the top-level profile
On the top-level profile, you now have access to a new group of settings under each tab. The Links tab has become the place where you manage all of your different location links. You can add, re-order, edit, show/hide, and delete them in Links > Review Profiles.
You can select what multi-location landing page layout you’d like to use from the Index Page type dropdown menu.
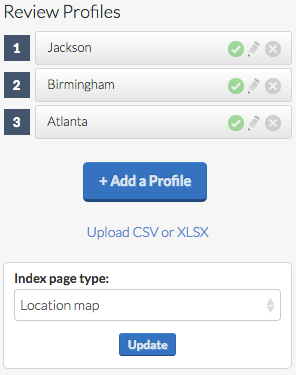
A few elements haven’t changed in the Links tab: you can still setup your notifications and social media buttons.
Note: Notifications recipients on the top-level profile will receive notifications for all locations in the multi-location profile.
The Content tab will have fewer options than on single-location profiles. You can edit the Message to all visitors and Attach an offer to the top-level profile only.
The Setup tab is identical to that on a single-location profile, but changes made here will apply to all locations. For example, if you change to the Stars layout or add Custom CSS, they will be applied to all locations underneath in addition to the top-level profile.
Editing an individual location’s profile
To edit any individual location’s profile (these profiles function nearly identically to a single-location landing page), simply click the Pencil (![]() ) icon next to its entry in Dashboard > Funnel > Links or select it from the profile selector menu in the top-left corner of the dashboard. The dashboard will change slightly upon loading but it functions nearly identically to the dashboard for a single-location business.
) icon next to its entry in Dashboard > Funnel > Links or select it from the profile selector menu in the top-left corner of the dashboard. The dashboard will change slightly upon loading but it functions nearly identically to the dashboard for a single-location business.
Under the Content tab, you’ll be able to fully customize the landing page text and content for the active location as you would any single-location profile. The changes made here will only apply to the active location unless you select Copy above to all sibling profiles? before saving your changes, which will apply the changes to all location profiles except the top-level profile.
![]()
The Setup tab has become This Profile, and its settings have been simplified.
![]()
Note that if you are using the Page Images button layout on your main landing page, you’d load in the image for each business in this panel.
URL structure
Multi-location profiles have a slightly different and longer URL structure than single location pages. The shortname you choose for the top-level profile will appear immediately after your domain, e.g.
yoururlhere.com/chainstore
Each individual location’s shortname will be added to end of the above url, e.g.
yoururlhere.com/chainstore/atlanta
Top-level profile perks
Multi-location profiles aren’t simply tools for easy grouping of profiles. The top-level profile gives you a few features that make it easier to handle customers and data in aggregate:
- Reports generated on the top-level profile can cover all locations in aggregate and individually
- The top-level profile’s email campaign will send customers to the top-level landing page
- Recipient lists uploaded to the top-level profile can be auto-sorted by location
- The top-level profile’s Reviews tab displays review and customer feedback data in aggregate
- The top-level review stream widget will display reviews from all locations
- The top-level landing page widget will show the top-level landing page
Made a mistake?
If you converted a single-location profile by accident, you can easily revert it. If you have already created several locations and decide you don’t want them grouped under a multi-location profile, get in touch. Our support team will be able to ungroup them for you.
Conversely, if you’ve created several single-location profiles that you want grouped under a multi-location profile, we can help with that too.